To the Nines
3D Modeled Character
Nines is a character designed to be the new mascot for Universal’s new theme park Epic Universe.
Duration
4 Months
Role
Product Designer (Sketching, 3D modeling, rendering)
Tools
Blender
Procreate
Adobe Photoshop

Final Render in Context at Universal’s Cabana Bay
Key Questions
What process leads to a successful 3D print beginning with a digital sculpt?
What is the efficient way to sculpt both a body and layered clothing for use on a single object?
How can I encompass Universal’s brand identity in one character?

Final Render in Context at Universal’s Diagon Alley

Process
01
Currently, only the basic land layout of Epic Universe is known. With that information, I looked to Donkey Kong, Classic Monsters, pirates, Milo from Atlantis, and more for inspiration to create the rugged and adventurous character that I thought represented Universal.
Mood Board

02
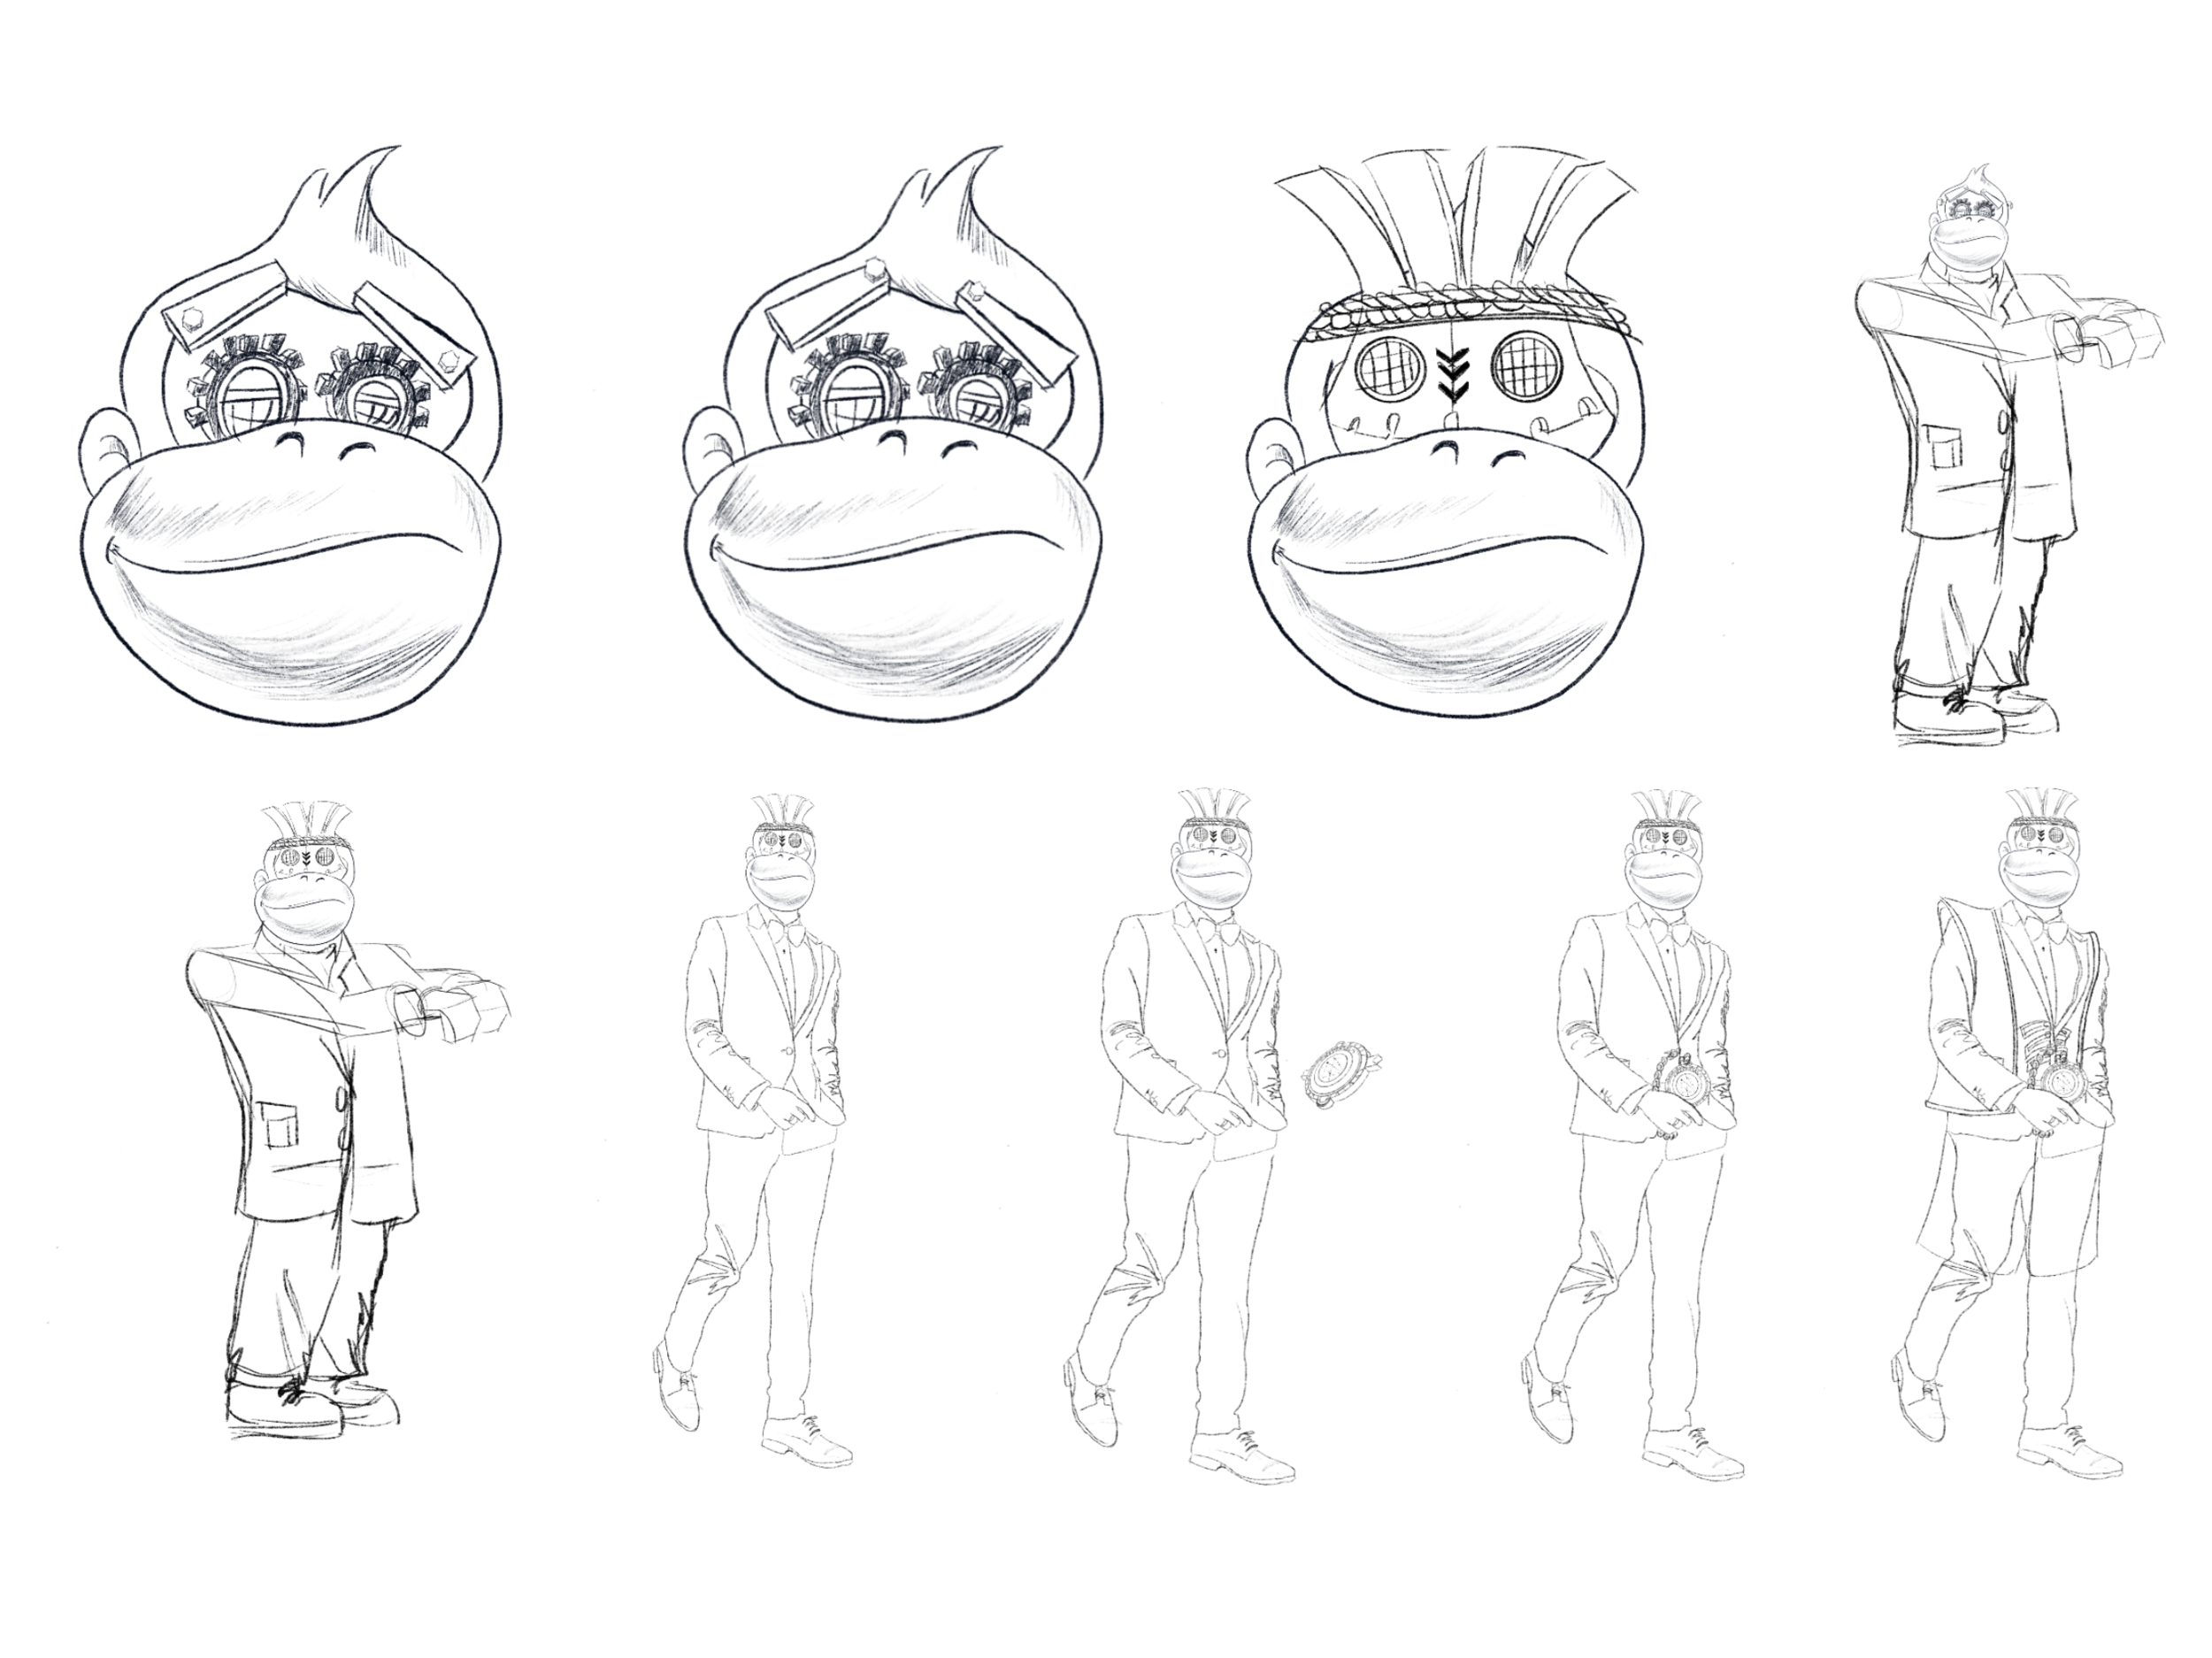
My goal was to combine as many possible elements of the new land as possible into one cohesive character, so I began with donkey kong and introduced classic monsters
Character Sketch


03
Introducing Nines: the suave new mascot for Universal's upcoming theme park Epic Universe. With a mischievous, mature, and ungraceful personality, he represents the tension between childhood interests and adult expectations.
He's meant to mirror what Mickey Mouse is to the Disney theme parks as universal continues to establish its place between high thrill and family rides.
Final Design

04
I decided to sculpt each piece of clothing separately before joining them at the end to ensure clear parting lines between material and ease of sculpting accuracy. The only downside was the computer’s difficulties with aligning vertices of the objects due to a high polygon count in Blender.
Final Sculpt


05
The first 3D print of Nines was done using white resin in a FormLab 3D printer. I aimed to have the entire print (including scaffolding under 120mL) for cost purposes. Unfortunately, there was an issue/disruption with the light-curing, and parts of his leg and arm were not completed so I was forced to reprint Nines on an FDM printer.
SLA Print

06
The second print was successful but I still wasn’t completely happy with it. I was unable to sand the surface to remove the bumps created by a 3rd party app, Mesh Mixer, which appeared when I made the blender mesh solid. To avoid this problem next time, I would need to spend more time testing tolerances in blender or take a more long winded approach to making the mesh solid.
PLA Print

Rigging
07


Final Render in Blender. I wanted to mimic the iconic “Partners” statue at Disney World of Walt Disney and Mickey Mouse so I used color, lighting, and material to make Nines out of bronze in Blender.
What’s She Working On?

Genzen.
How can I create a watch that incorporates the values and design guidelines of the tea brand TAZO?

Koazzy.
How can we aid those 65 and over in conducting their “Activities of Daily Living” (ADL) or “Instrumental Activities of Daily Living” (IADLs) needed to live independently in a community?